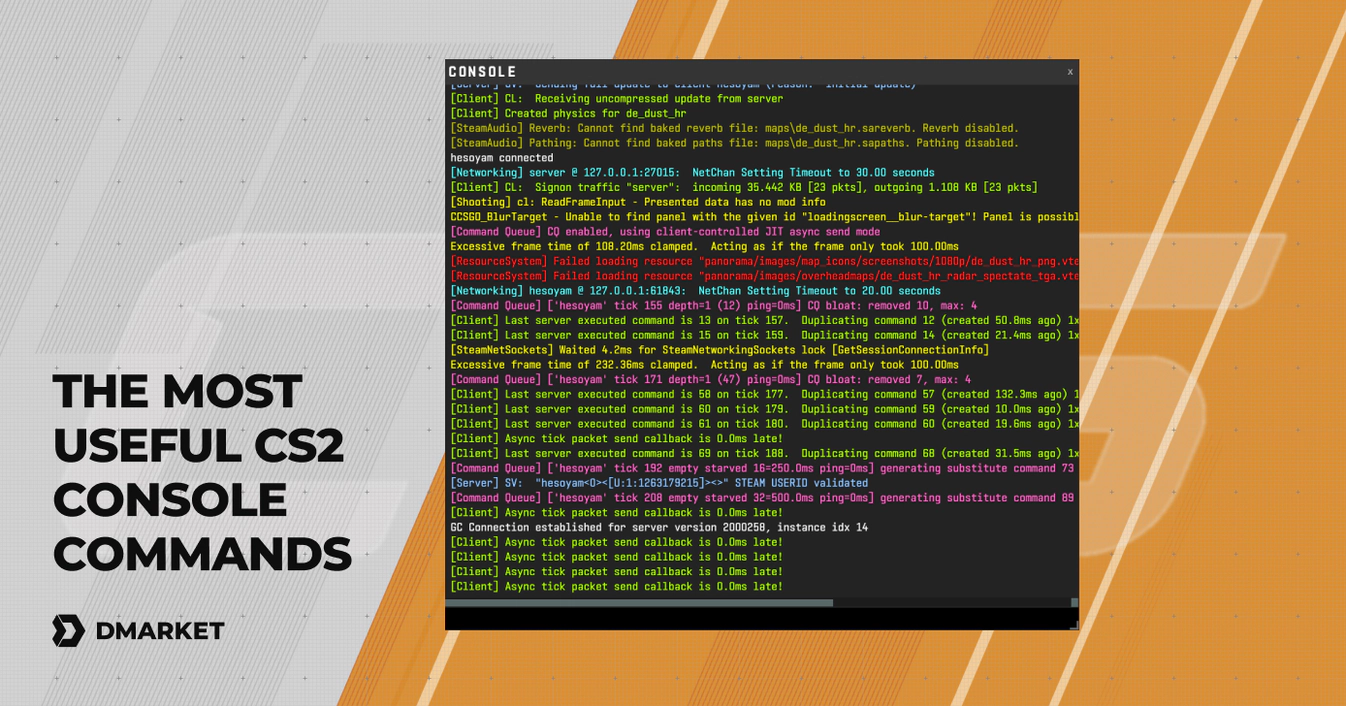
The Most Useful CS2 Console Commands
Counter-Strike 2 has taken quite a few steps towards better accessibility in customizing various settings. Many options are available directly in the game menu, which is quite in tune with modern standards. Still, console commands are also here, if you prefer this classic approach, and if you’re looking for the finest adjustments possible.
For this article on DMarket, we’ve selected the most useful CS2 console commands to help you create a comfortable playing environment, let your skills shine, and achieve countless exciting victories.
Sure, these CS2 commands can’t make you a better player. Regular training is essential for this. But with some settings adjusted through the console, you can certainly remove annoying obstacles or inconveniences on your path to success—and better CS2 ranks.
How to Enable the Developer Console in CS2
Unlike in CS:GO, the developer console in Counter-Strike 2 is disabled by default (at least in the game build at the time of writing this guide).
These steps are needed to start using CS2 commands:
- Open ‘Settings’ (an icon in the upper left corner)
- Head to the ‘Game’ tab
- Choose ‘Yes’ for ‘Enable Developer Console’ (~)**
As the menu clearly suggests, the developer console can be activated by pressing the tilde key (~) in the game. After that, you are ready to enter commands.
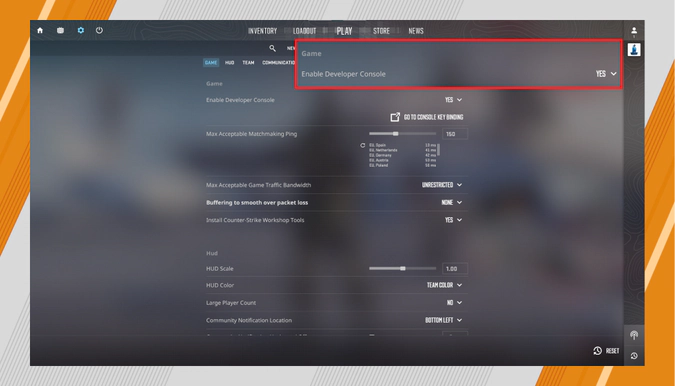
It is possible to re-bind the console button in Counter-Strike 2. In the ‘Settings’, go to the ‘Keyboard/Mouse’ tab, and change the key near ‘Toggle Console’.
The Best CS2 Console Commands
There are lots of console commands in Counter-Strike 2, and every one of them changes various game aspects: from HUD to FPS settings. It’s important to consider how these CS2 commands can help you win matches and become one of the best players. Let’s go!
- fps_max 0
With high FPS, you don’t have unnecessary technical delays. fps_max 0 allows players to unleash the full potential of the gaming computers and monitors. For older hardware, it may be a good idea to set up the exact number of FPS, like fps_max 45, to achieve stable performance—and thanks to this, also play better.
- cl_showfps 1
It may support the previous command, showing you how many frames your gaming machine can really support. With cl_showfps 1, an FPS count appears in the right upper corner, and cl_showfps 0 removes the count.
- cl_interp_ratio 1
This command adjusts the interpolation amount, which affects movement smoothness between ticks, or moments of exchanging data packages between the server and the client (your computer). Try out cl_interp_ratio 2 if your internet is laggy. Solve your connection issues by paying for a better plan or by connecting your PC via Ethernet instead of Wi-Fi, and return normal interpolation with cl_interp_ratio 0. And read our guide about interp settings.
- +cl_show_team_equipment
Enter this command to permanently place info on your teammates above their heads. You will see their nicknames and current weapons/equipment. -cl_show_team_equipment returns to normal mode.
- cl_drawhud 0
For the purpose of individual practice, you may decide to remove all the HUD elements during Counter-Strike 2 matches and cl_drawhud 0 does the magic. Such a step may help you focus on the action without any distractions. Still, it’s worth remembering that HUD gives you essential info on what’s going on in the game.
In addition, we can name a few other useful CS2 commands, related to HUD. They can force various elements to appear or disappear regardless of cl_drawhud. Their values are universal: -1 to never show, 1 to always show, and 0 to use the general HUD settings. The commands are:
- cl_drawhud_force_deathnotices 0 for death notices,
- cl_drawhud_force_radar 0 for the radar,
- cl_drawhud_force_teamid_overhead 0 for the info above teammates’ heads.
One of the most important pieces of information on a current in-game situation is how much health teammates have. This will help you to use it most effectively. You may want to take a look at our guide on CS2 damage to better understand how this game system works.
- bind [action] [key]
Use this command to bind a game action to a specific key. With the advanced customization settings in CS2, only very specific bindings require the developer console assist. Most action-key connections can be easily changed directly in the game menu. Learn more about jump through bind in CS2.
Two additional commands can reverse the first one: unbind [key] to unbind one selected key, and unbindall to cancel all your custom bindings and return to the default settings. Binding keys is an effective way to adapt CS2 controls for your habits and preferences. You need to feel comfortable in the game to win matches.
- sensitivity [mouse sensitivity]
It’s a pretty important CS2 console command, as it sets the mouse sensitivity. 2 is the default value, so change it if you need to.
Most pro players and enthusiastic competitors prefer low sensitivity to make precise in-game actions with big real-world movements. Of course, having one of the best mouse models for CS2 may give you even better control and easy accuracy.
- voice_scale 0
You can mute other players with this command. While team communication is crucial for your CS2 success, sometimes, your partners are too toxic or simply noisy. voice_scale 1 sets the default volume for the voice chat, and you can use something in between to make teammates not that distracting.
If you often find yourself put on a team of toxic and just indecent players, consider using the magic of VPNs for CS2 and teleport into another dimension of the community.
- voice_modenable 0
Turn off your microphone. Sure, the game and your computer have other ways to mute you when it’s needed. But if you like the CS2 console commands better, use this one. voice_modenable 1 returns the usual mode for your mic.
CS2 Crosshair Commands
The whole idea of adjusting the CS2 crosshair is to create the most comfortable environment specifically for you. Seeing where you shoot but with an unnoticeable crosshair is the balance to strive for.
The game gives some options in the standard menu, sure. But if you prefer the console, here are some CS2 commands for the crosshair.
- cl_crosshairstyle [style]—there are six possible crosshair styles with this command: 0 for the default one, 1 for default static, 2 for classic static with dynamic dots, 3 for classic static, 4 for classic dynamic, 5 for the classic static and dynamic style. It’s a good idea to try them all out to see the difference with your own eyes.
- cl_crosshairsize [size]—change the size of your CS2 crosshair. 5 is the default value.
- cl_crosshairthickness [thickness]—adjust the thickness of the crosshair lines.
- cl_crosshaircolor [color number]—the command can activate different colors: 0 for red, 1 for green, 2 for yellow, 3 for dark blue, and 4 for cyan.
- cl_crosshairgap [size]—the size of the gap in the middle. Change the number to see the difference.
- cl_crosshairdot 1—to add a dot to the center. cl_crosshairdot 0 removes it. Learn more about Dot crosshair.
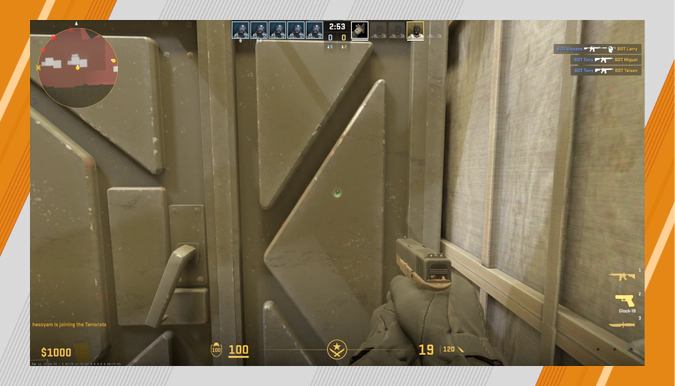
For more info on this aspect, check out our article on the best CS2 crosshairs.
CS2 Commands for Training
Quite a few console commands in Counter-Strike 2 affect the physical features of game objects and give various unfair advantages. That’s why they are unavailable in the official multiplayer and on most public servers. Still, such CS2 commands can help players create specific training scenarios, focusing on selected aspects and situations. We’ve put them in this sub-category. Use these commands in offline matches or on your custom servers.
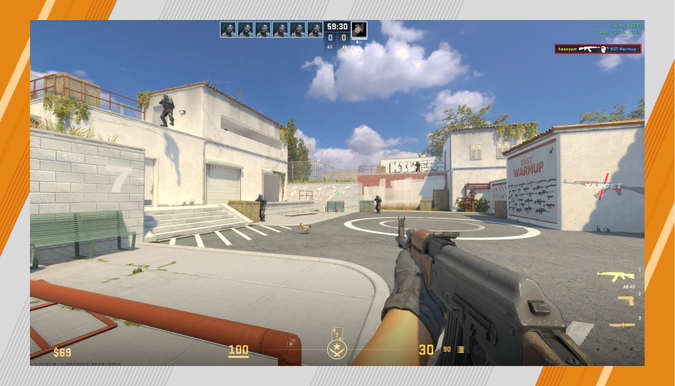
- sv_cheats 1
It’s the basic command to allow most practice commands (cheats) in your game. To remove this option, simply enter sv_cheats 0.
- sv_infinite_ammo 1
Reloading your guns is an important part of CS2 gameplay. You need to learn when it is best to do so. But when improving your accuracy, you may not want to get distracted. With this command, you’ll get infinite ammo. Cancel this with sv_infinite_ammo 0. If you enter sv_infinite_ammo 2, you will have infinite reloads for a weapon—it’s great to have a more realistic game experience without bullet limitations.
- give weapon_[name]
Practice with a selected CS2 weapon without purchasing it. Just enter this code and add a weapon name to it. For example, use give weapon_awp to get the AWP sniper rifle or give weapon_m4a4 for CT’s assault rifle. Check all the weapon commands to try in our article.
- noclip
Your character will be able to fly around CS2 maps, moving through solid objects. The noclip command is helpful for learning shooting locations.
- sv_gravity [gravity]
You can set the gravity in Counter-Strike 2 thanks to this console command. The default value is 800, so with 450 for example, everything will be almost twice lighter; your character will jump much higher, and the fall time will be longer. It’s an interesting option for training, a variation of noclip regarding movements.
- god
Add the feature of invulnerability, so no harm can be done to you in CS2. Getting killed during training is a clear measurement of how you spend the health resource in risky situations. But that may be annoying if you want to improve your movement in CS2 or focus on something else.
- kill
Enter this to kill your character. This may be helpful for some training situations, such as when you are located on a wrong bombsite, and the fastest way to reach the action is to use kill and then take control of a bot on your team.
- mp_respawn_on_death_t, mp_respawn_on_death_ct
Terrorists/Counter-Terrorists will respawn immediately after being killed. These CS2 console commands can intensify your training by adding endless waves of opponents.
- mp_roundtime [minutes]
Time for game rounds can be adjusted with this command. The number corresponds to minutes, and if you need to have, say, two minutes and 30 seconds, it will be mp_roundtime 2.5.
With mp_roundtime_defuse 3 and mp_roundtime_hostage 3, you can specify round time for exact game modes: Bomb Defusal and Hostage Rescue. You can read more about all CS2 modes in our article.
- mp_buytime [seconds]
You will have 10 extra seconds to make your purchases at the beginning of every round if you enter 10. Note that the time you add to this command starts after 15 seconds of the round countdown. Increasing the buy time may be a good idea for beginners to improve speed and then make no mistakes in real CS2 matches.
- mp_buy_anywhere [0/1/2/3]
It’s an alternative to the previous command in your purchase training, The buy menu will be available for both teams anywhere on the map if it’s 1. Add 2 instead of 1 to make this option available only for Terrorists or 3 for Counter-Terrorists. mp_buy_anywhere 0 returns the usual CS2 weapon purchases in the Spawn zones.
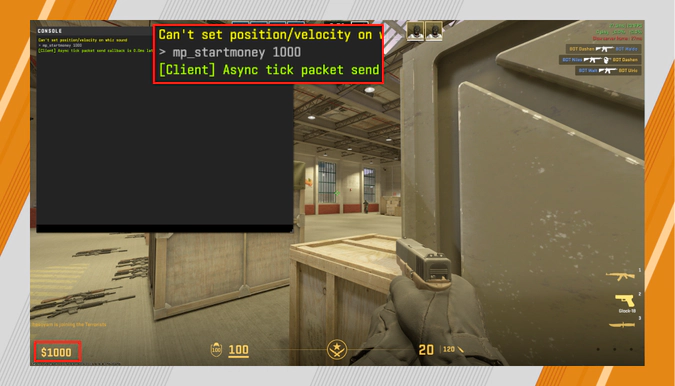
- mp_startmoney [amount]
Set the amount of money you have at the start of each match half during CS2 training matches. The default amount is 800.
- mp_maxmoney 65,535
Specify the cap of money players can earn in CS2 matches. The game limits the max amount to not give a too big advantage to one team and to leave some chances for comeback even after a few lost rounds. 65,535 is the biggest amount a player can have in the game.
Not all game modes are affected by the economy, as you can play Deathmatch or Arms Race, introduced in the first big CS2 update.
- mp_restartgame
This command gives you a quick way to restart the game. This may be needed to activate some commands and to start playing with new settings. You can use mp_restartgame 30 to restart in 30 seconds.
- mp_match_restart_delay [seconds]
Use this command to have some extra time before your match restarts. The number corresponds to seconds.
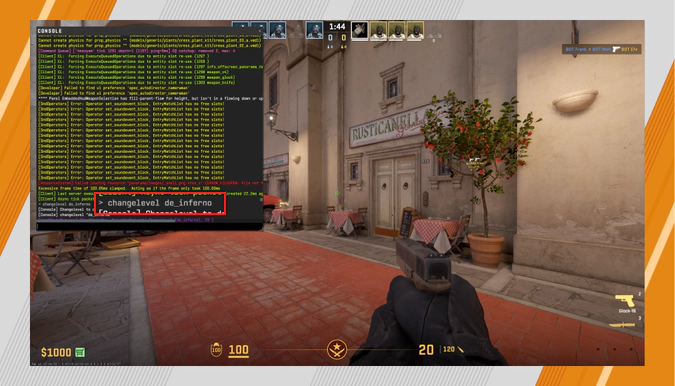
- changelevel [map code]
It’s a command for changing the CS2 map you play on; using it is quicker than resetting the match. Map codes come in the format of de_mirage, de_inferno, de_ancient, de_dust2, de_anubis, de_nuke, and cs_vertigo.
- launch_warmup_map [map code]
It’s a useful command for serious players. It activates a 10-minute-long Deathmatch on a chosen map. The map codes are universal for all CS2 console commands.
Such warm-up sessions will make you nicely prepared for proper Counter-Strike 2 matches. It’s better to go through them than be unable to perform well in the game, rage quit, and thus potentially negatively affect your Trust Factor.
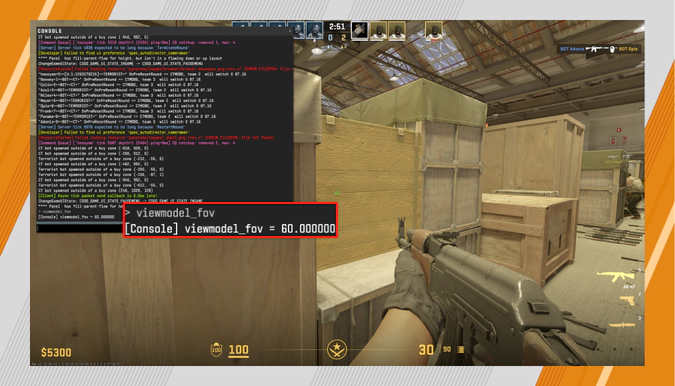
- viewmodel_fov [number]
Change your field of view with this command. 60 is default, and 68 is the max. Increasing the value will bring you more visual information. Matches with such a view are not real for CS2, but training with unusual conditions may help you develop specific skills.
- bot_add
Training with bots is a good idea for developing and polishing your CS2 skills. To take control over the number of bots, you can use this command, which adds one bot to your current team. bot_add_ct and bot_add_t are practical alternatives, as they specify a team to add a bot to. With the command bot_place, a new bot for your team will appear in the area you are looking at.
- bot_knives_only [0/1]
All bots in your match will play with knives only if you enter 1. It’s an effective trick to make them harmless on long and mid distances. This setting may be convenient for practicing accuracy with sniper rifles and some other game aspects.
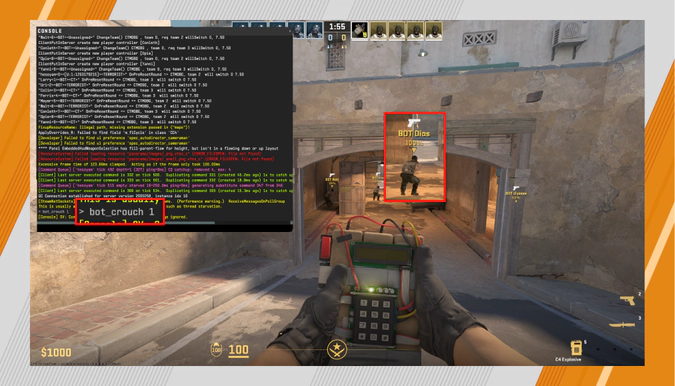
- bot_crouch 1
All bots in your game will crouch. This may be helpful to train your aim when opponents hide behind low objects. It also may be part of map learning. bot_crouch 0 returns the usual behavior.
- bot_stop 1
Every bot in the game will freeze. This may give you time to think about strategic positioning, consider possible team actions, or just have some extra fun in Counter-Strike 2.
- cl_disable ragdolls 1
You can disable ragdoll physics, slightly decreasing the load on your system and removing weird positioning of bodies. It is still a training command, but its practical usage is very niche. Also, check out our dedicated article that specifically describes CS2 practice commands and configs.
CS2 Console Commands in Autoexec
After you have found your best Counter-Strike 2 settings, it might be a good idea to save them in an autoexec file—to quickly activate on a different computer or to reverse your own experimental changes.
Autoexec is basically a text file with all your console commands. It has to be saved in the game folder with the name autoexec.cfg. Then you will be able to activate your settings with one command only, exec autoexec.cfg, or to use them permanently by adding +exec autoexec.cfg to the Launch Options.
Here is a step-by-step tutorial on how to create an autoexec config file for CS2:
- Open the game folder: right click CS2 in Steam, choose Manage -> Browse Local Files, and head to the folder game\csgo\cfg.
- Create a new .txt document here: right click and choose New -> Text Document.
- Rename the new document to autoexec.cfg. Confirm that you want to change the file extension.
- Open your autoexec.cfg with Notepad and add all your CS2 commands—each on a new line. Save all the changes.
- Launch Steam, right click CS2, choose Properties and in the General tab find Launch Option. Add the command +exec autoexec.cfg to the text box.
- Launch Counter-Strike 2 and enjoy the game.
The autoexec.cfg file will be used automatically after that, and if you need to reverse this action, just delete the command from your CS2 Launch Options.
How to Remove Console Commands from CS2
When you need to return to the default settings:
- Just restart CS2, and most console commands will be removed.
- Head to your game folder (game\csgo\cfg), and delete the config.cfg file (the game will create a new one when you launch it). If you’ve created autoexec.cfg, delete it or remove +exec autoexec.cfg from the Launch Options.
Before adjusting CS2 settings in the game console, get enough basic experience in Counter-Strike 2. You need to know what works for you to eliminate obstacles on your way to success. No console command on its own can make you a better player, only dedicated practice.
For other practical CS2 guides, stay tuned to the DMarket blog! And to support your progress (and style) in the game with cool weapons, buy the best CS2 skins on our marketplace.
Trade on the go - install the mobile app of DMarket from Google Play or App Store. Never miss great prices and unique skins. The best CS2, Dota 2, Rust and TF2 marketplace is always at hand!


Follow us on Facebook and Twitter to get more interesting articles about CS2!


